Better Source Code Navigation - Part 1: SourceGraph Installation and Saving Search Contexts
Introduction
Welcome to the first of a series of blog posts on how to better navigate and understand the source code of various repositories using publicly available tools. Many times during my development efforts I find that often it's not necessarily the language itself that is hard to understand, but rather understanding how the architecture of a system is laid out so that you can link the necessary files together to answer the question that you have on your mind at the time.
To solve this problem, I often use a tool called SourceGraph which allows me to search through publicly available source code repositories to find the code that I am after. However, when I first started using SourceGraph I didn't quite fully understand how to use the tool effectively. This was in part cause I didn't understand what the tool was capable of, but also because I found a lot of tutorials didn't give any practical examples to go along with their explanations.
This tutorial series aims to solve this by breaking down some of the capabilities of SourceGraph into byte-sized tutorials complete with practical examples that you can try your hands out with to fully understand how to use it to speed up your daily work.
Installing SourceGraph
SourceGraph can be found at https://sourcegraph.com/. The first thing you'll want to do is sign up for an account. Navigate to https://sourcegraph.com/sign-in?returnTo=/search and then sign in with your GitHub account. This isn't strictly needed to search, but it will allow you to save searches as well as contexts to perform your searches under, which I will explain in a sec.
Once this is done the next thing you'll want to do is navigate to https://docs.sourcegraph.com/integration/browser_extension and install the browser extension. This will allow you to navigate pages like GitHub and get a nice hover-over pane with the option to see where a variable or function is being used and where it is being defined.
To test that this is working, navigate to https://github.com/rapid7/metasploit-framework/blob/master/modules/exploits/windows/oracle/extjob.rb, and then hover over the word update_info on line 13.
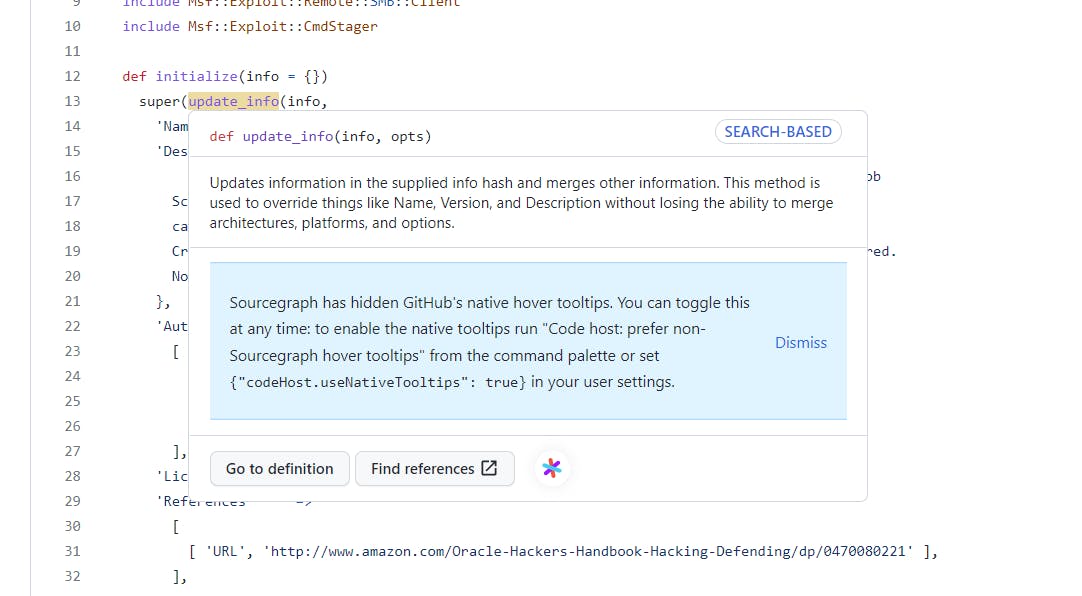
From here you can click on Go to definition which should show you where this function is defined at:
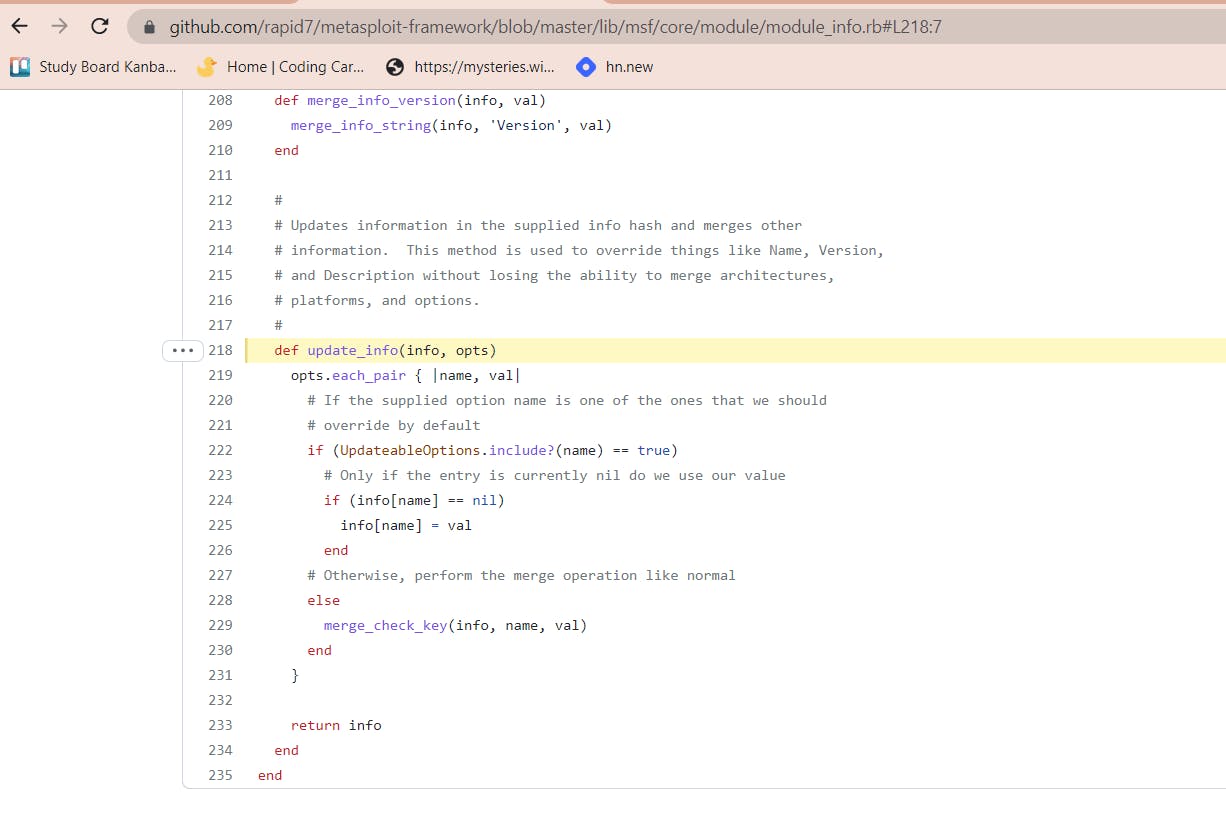
This takes us to https://github.com/rapid7/metasploit-framework/blob/master/lib/msf/core/module/module_info.rb#L218:7 where we can find the definition of the update_info function within the file lib/msf/core/module/module_info.
What if we wanted to take a name within a particular function and see everywhere that is being used? We can also do that as well. Navigate to https://github.com/rapid7/metasploit-framework/blob/master/lib/msf/core/module/module_info.rb#L84 where there is the definition for the function merge_check_key, and hover over the word merge_check_key. You should see a button called Find references:

Clicking on this will show the following page (should redirect you to https://sourcegraph.com/github.com/rapid7/metasploit-framework@master/-/blob/lib/msf/core/module/module_info.rb?L84%3A7=#tab=references):
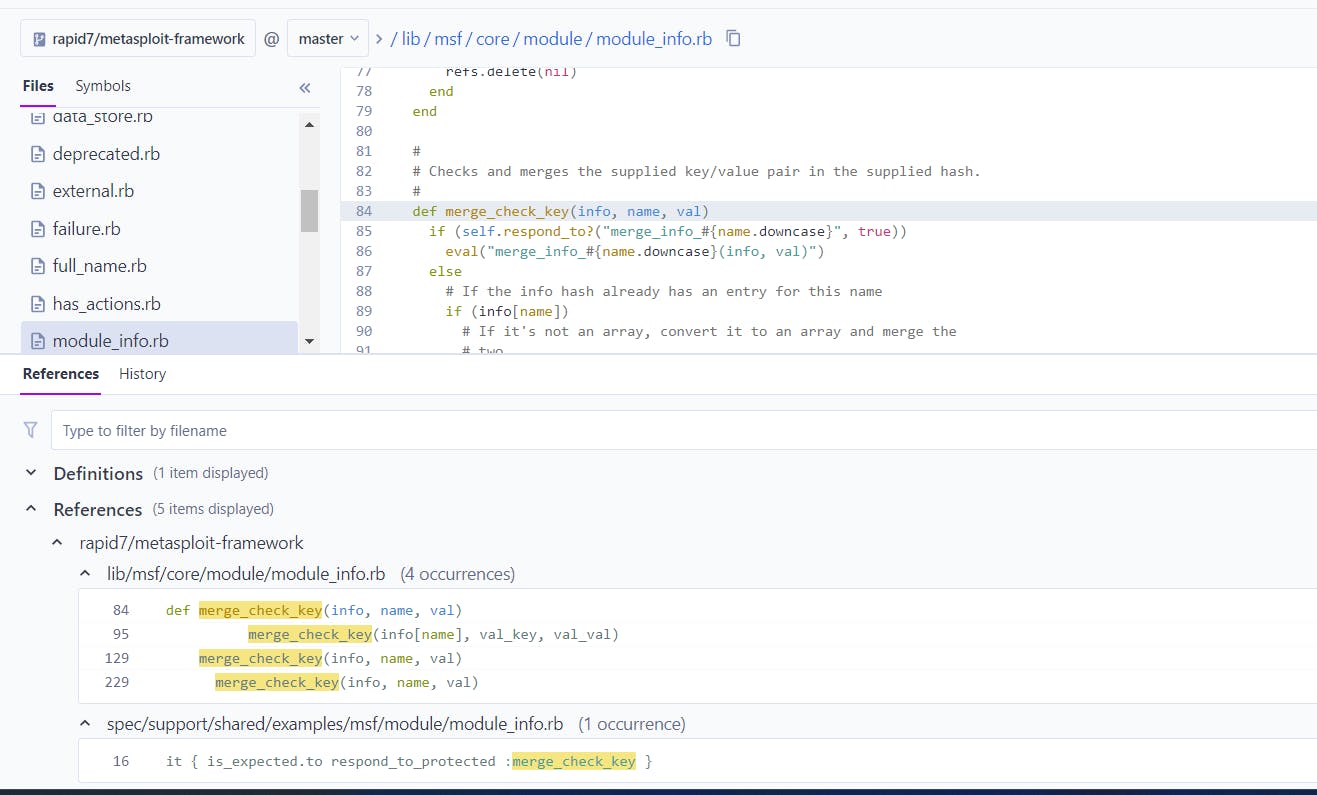
Here we can see that there are a total of 5 references, as noted by the 5 items displayed note. Note that SourceGraph can only display a maximum of 500 references at a time, so if you go above this, you will need to narrow your search down.
Looking closer at the results we can see the original definition line, 3 other places within the same library where the function is called, and a reference to the function within an RSpec file. From this, we can start to determine where the function might be used and then trace this back further to areas of the code we are interested in.
The Importance of Context When Searching
All of the above is stuff that one can easily find by searching around however the part that struck me as particularly useful and interesting when using SourceGraph is the context options. To show you what I mean let's take look at https://sourcegraph.com/contexts. Here is what mine looks like:
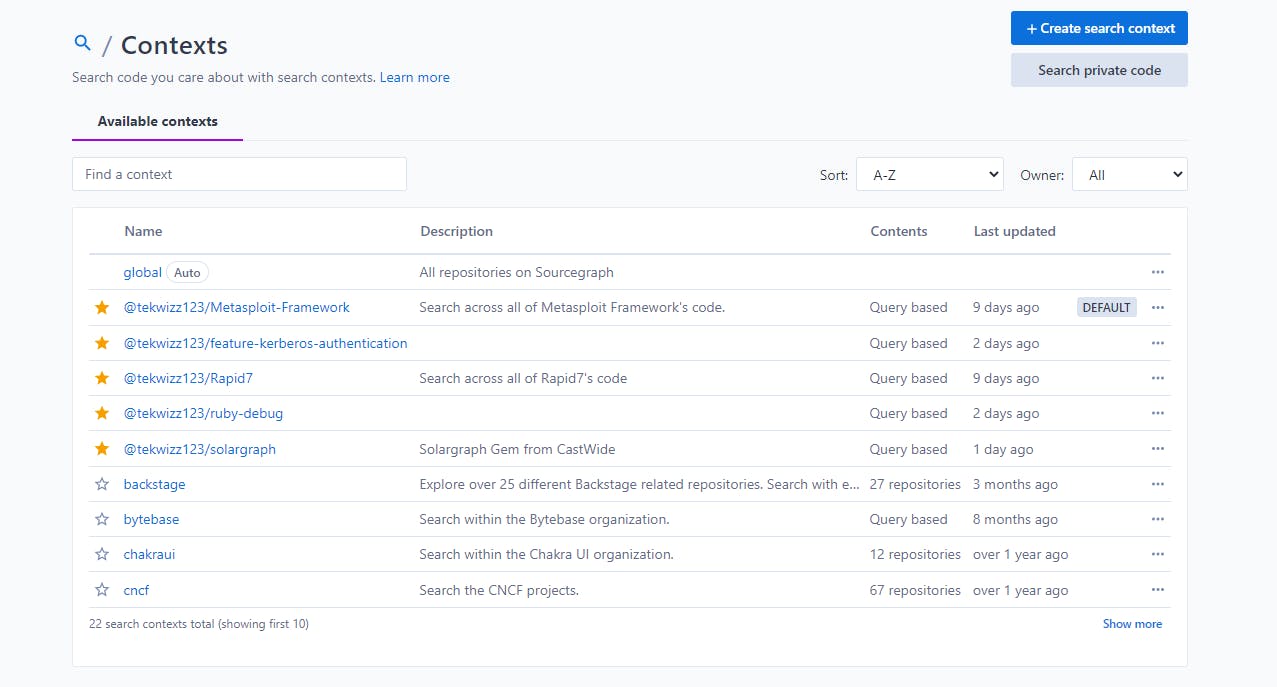
This is probably quite different than yours. Normally the DEFAULT tag that you see will be put on the default global context. As noted in the description, this will search all code repositories within SourceGraph. However often we want to only search a specific organization or a specific repository and then narrow the search down further from there.
To solve this problem, you can use custom contexts to tell SourceGraph to automatically apply certain filters when you are performing a search. You can then Star these searches so that they appear first in the dropdown menu for switching contexts when you are performing search operations. To access this menu, simply click to the left of the search bar, where it says context: and then this menu should open:

From here you can choose the context you wish to search under.
Anyway getting back to the point, to create a custom search context, go to https://sourcegraph.com/contexts, click on Create Search Context and you should see the following page:
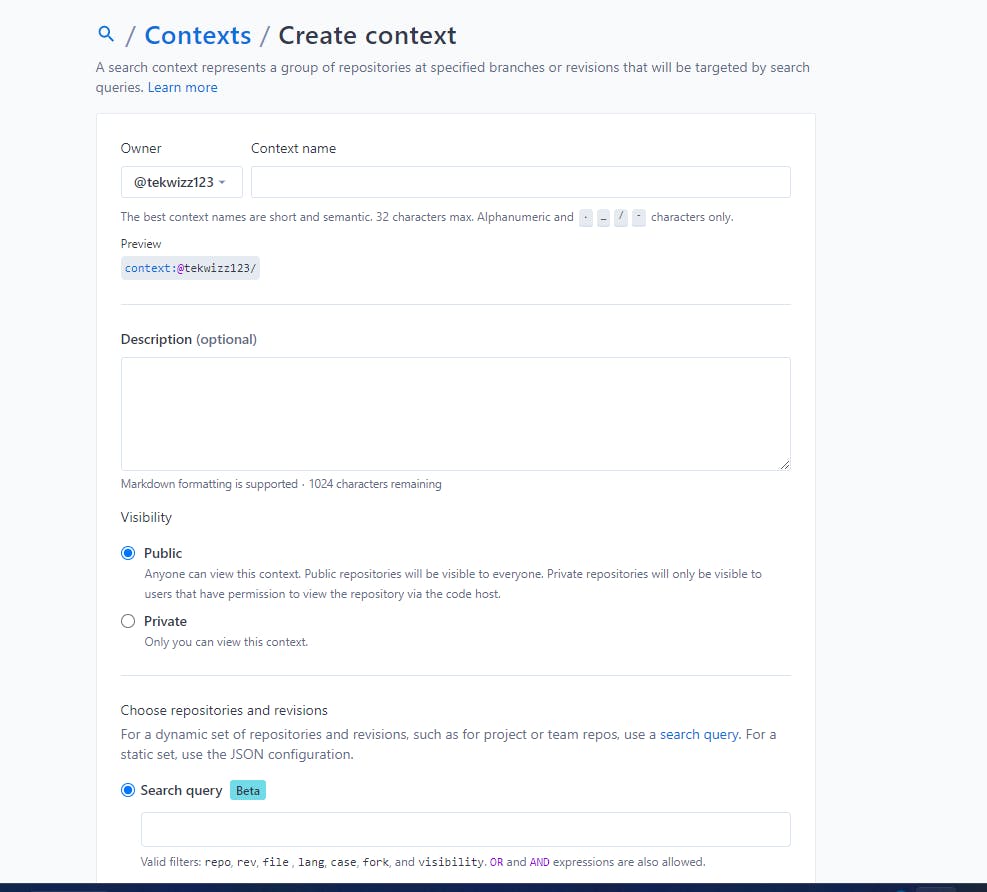
What you'll want to do here is put in a custom name for your context and give it a description that will be helpful when referencing it later on. Note by default the context will be public so that other people can see and use it, but if you don't want this you can turn the Visibility setting to private.
Next under the Search query part you will want to enter a search query. The reference for search queries can be found at https://docs.sourcegraph.com/code_search/reference/queries however here are a few tags that I find most useful:
repo:<regex-pattern><- This is mostly useful for searching within a specific repository or within the repositories of a specific company.repo:^github\.com/rapid7/metasploit-framework$<- This is a good example and will only search code within Rapid7's metasploit-framework repository.repo:^github\.com/rapid7/.*<- Will search all of the repositories owned by the userrapid7, which is useful for searching for code across a specific organization.
rev:<branch/tag/commit hash><- This allows you to narrow your search down to only those pieces of code within a specific branch, or that belong to a specific tag such as a version tag for a specific version of code. You can also specify a commit hash to search across the code base at a specific point in time.repo:^github\.com/rapid7/metasploit-framework$ rev:feature-kerberos-authentication<- This will search across only thefeature-kerberos-authenticationbranch of the repositoryrapid7/metasploit-frameworkon GitHub.
author:<name>-> Search only commits or diffs authored by a specific user.lang:ruby-> Return only files that are determined by SourceGraph to be Ruby files.
Finally, scroll down to the bottom and click Create Search Context and then on the list at https://sourcegraph.com/contexts, click the star button to see an orange star next to the entries you use frequently to have them highlighted in the suggestions. Finally, click the ... on the line of the context you use most frequently and click Use as default to set that as the default context for all searches.
Conclusion
Hopefully, this has provided at least an initial introduction to how to set up SourceGraph and some of the functionality that you can do with it. If you're interested in exploring more, I highly recommend reading over the search query syntax at https://docs.sourcegraph.com/code_search/reference/queries#standard-search-default for standard searches as well as reviewing the list of keywords at https://docs.sourcegraph.com/code_search/reference/queries#keywords-all-searches.
Note that SourceGraph will attempt to help to autocomplete filters when you are typing things in so your best bet is to play around and try to figure out what filters matter to you personally that you will likely want to use in your searches, and then save a few search contexts using these syntaxes for easy use later on.
In the next two tutorials, I'll be walking through some of the more advanced searches using the regex and structural search types of SourceGraph. Until then, have fun!